6 Steps & Tools For Lawn Care in Autumn
The time of year is once again upon us. Summer has disappeared all too quickly, but it is now time to prepare your lawn for the coming winter. By spending just a small amount of time on lawn care this Autumn, you can give it as much chance to grow full and healthy come the spring months.
Autumn is the ideal time to start your lawn preparation as there is still enough moisture and warmth in the air to simulate growth before the colds of winter set in. By using these 6 specially designed lawn care tools, you will be able to tackle any size lawn in no time.
Step 1 Leaf Collection (Leaf Blower)
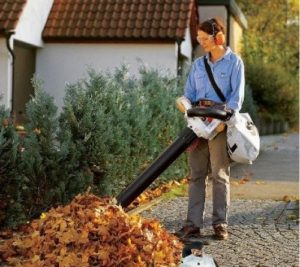
If your lawn is leaf prone, you are probably already aware of the task that’s ahead of you. Leaves are probably the number one characteristic of Autumn. The beautiful colours of brown, red and yellow completely engulfing your lawn space. Which for a while looks beautiful, but without removing them, you are restricting the amount of water being able to reach the soil and root structures of your grass. So how can you remove them quickly and save yourself from the endless amount of racking you could be in for? The answer is a leaf blower.
Leaf blowers are designed to propel air to move debris such as leaves and grass. You can use this tool to round up all the leaves into one pile before removing them all at once. It takes the time, stress and hard work of leaf collection. Some leaf blowers even double down as a vacuum, making removing your lawn debris even simpler.
Step 2 Mowing (Lawnmower)
Once you have removed all of the leaves and debris off your lawn, you are now ready to cut it. If you pay a lot of attention to your garden, you’ll already notice that during Autumn, you cut your lawn less as there is very little growth. It is important that if you are aiming to prepare your grass to look its best in spring, then you must start cutting at the correct length.
By using a mower on its highest setting, you can establish an even cut across your whole lawn space. For now, avoid mowers that have rear rollers, as additional compaction could cause your lawn to suffocate itself. Most lawnmowers are powered by either petrol or electricity. We would always advise using a petrol mower for larger lawn spaces. For extra-large lawns, you may even want to invest in a sit/ride-on mower, which will take hours or even days to cut.
There are many amounts of different types of lawnmower such as push, self-propelled, roller, cordless, mulch, ride/sit and now robotic. It’s fair to say there is a huge amount of options when it comes to lawn care. In addition, using any type of lawnmower will help remove any spare leaves or debris that have been left behind whilst leaf blowing. Try to aim for a grass pile height of around 40mm. Once you have cut your lawn successfully, you are ready to move on to the next process which is addressing your borders.
Step 3 Edging (Edging Shears)
Now you have rounded all the debris from your lawn space and cut your grass to an even length. It’s time to focus on your borders. Overgrown borders can make a tidy lawn look scruffy, even if your grass is cut even. It is important that during Autumn that you reset your borders ready for next year’s growth. To do this, you are best using a pair of edging shears. Edging shears are manual, long-handled tools that operate parallel to the ground. They act as a giant pair of scissors that can be used while standing up. This allows you to cut along your lawn borders, making them neat and set for the springtime.
When resetting the edges and borders of your lawn, do not be afraid to cut too short unlike when mowing. By cutting the edges nice and short, you are re-establishing its shape. A quick tip: if you are struggling to cut a straight line when using edging shears, you can always cut along a straight piece of timber to help.
Once you have worked around the entire perimeter of your lawn section, then you are ready to move on to the next stage of lawn care.
Step 4 Scarifying (Scarifier)
The next stage of the lawn care process is to remove all the dead thatch from the lawn. Lawn thatch is an organic build-up of matter within your grass that develops over time. It is a combination of living and dead plant matter all bundled into one. To keep a healthy, lush lawn, removing thatch is important. During Autumn there is no better time to do so. A small amount of lawn thatch is not the end of the world, however, if you let it build up over several years, you could have some issues. Failure to remove lawn thatch can cause patchy, uneven lawns that can end up dying in the long term.
The best way to remove lawn thatch is with a scarifier. A scarifier can also be referred to as a “lawn dethatcher”. This machine is designed to cut through the soil to help you remove any thatch that has accumulated over time. Once this has been passed over your surface, the residue of the thatch pile will be lifted out of the lawn for you to remove by hand. It is best advised to run the scarifier over your lawn at the highest setting first and slowly work downward if need be. Going too deep with a scarifier will cause holes in your lawn, which can permanently damage your surface. The trick is to find the right height.
Be sure to pass the scarifier over a couple of times in multiple directions. This will allow the machine to lift as much thatch as possible from your lawn. Once you have lifted as much thatch out of your lawn as possible, you will need to remove the remaining debris. You can do this by running your lawnmower over the surface again on the highest setting, or depending on the size of the area you are working with, you could rack up the debris.
Step 5 Aeration (Aerator)
Now all of the debris on the lawn has been removed, the next stage of lawn care is aeration. Lawn aeration takes place to some degree whilst scarifying your lawn. However, to make sure that your lawn has the best chance of looking lush come springtime, it is worth aerating.
Aeration allows you to separate the particles within the root structures and soil. It also reduces compaction and allows the lawn pile ability to absorb more water and nutrients.
To get started, you will need to use an aerator machine. These are fitted with either hollow or solid spikes which penetrate to the ground as the machine passes over it. This punctures a hole in the ground which will allow a far better circulation of air and water into the soil. It also helps with soil compaction. Each year it is always best to test for soil compaction. To do so, simply take a standard screwdriver and try to insert it into your lawn. If you struggle, then your ground is far too compact and aeration is desperately required.
Step 6 Seeding (Spreader)
The final process for lawn care in Autumn is to reseed. Seeding is not always required, especially if your lawn is already in great condition. However, if you require some further seed, using a Seed Spreader would be extremely beneficial. This device is cleverly designed to distribute a certain weight or number of seeds at any one time. These machines can be wheeled by hand and are extremely simple to use. Be aware that you will be required to add additional water to your lawn thereafter to allow your seeds to germinate.
Get help with lawn care
There is no better time to prepare your lawn for the coming winter. We here at WHC Hire Services have been helping the public and tradesmen prepare lawns for the cold winters months.
With constant investment into the quality of our equipment, we can deliver the most up to date and effective machinery for lawn maintenance. With depots in Tewkesbury, Worcester and Chipping Norton our quality groundskeeping equipment is never too far away.
Click the link below to find out more information on our lawn maintenance equipment or call 01684377977 to discuss your project with us. https://whchire.com/category/gardening-grounds-keeping/


