How to Level Your Ground For Turf. Tips & Tools for Pro Results.

Sick of looking out the window at a lawn that looks as lumpy and bumpy as the Cotswolds countryside—or like something Humpty Dumpty might have left behind? Have you ever wondered what it would take to transform it into a smooth, professional-looking lawn?
The truth is, it’s easier than you think—especially if you have the know-how and the right tools. If you’re finally fed up and want to level your ground for turf, you’re in the right place.
Poor preparation can lead to future bumps, drainage problems, and, in some cases, turf that simply won’t take. To help you avoid all the drama, we’ve put together this WHC Hire guide on preparing and levelling your ground for turf.
By the end of this article, you’ll have the confidence and know-how to tackle this DIY task faster than you could get a tradesman to your door.
Why Levelling Matters Before Turf Installation?
You might think that laying turf is as simple as rolling it out and watering it—but a bumpy, uneven lawn can quickly turn your garden dream into a nightmare if not installed properly. The secret to a healthy, long-lasting lawn is all in the groundwork.
Healthy Roots Start With Level Soil
The groundwork always starts with a solid, even foundation to establish strong roots. If turf is laid on uneven ground, some roots may struggle to take hold, leaving you with a weak and patchy surface. Think of it like building a house—poor foundations are going to cause a whole heap of issues further down the line.
Avoid Poor Drainage and Pooling
Turf needs water to thrive, but too much—or unevenly distributed—can be a problem. Low spots caused by uneven surfaces can lead to water pooling, turf rot, mould, and muddy patches. A level lawn ensures water is evenly distributed, giving every blade of grass the hydration it needs to flourish.
Easier Maintenance
Flat lawns are much easier to maintain. Uneven surfaces can cause scalping or damage when mowing. By starting with a level foundation, you’ll enjoy a neat, even finish and save yourself plenty of hassle in the future.
Professional-Looking Finish
There’s nothing quite as satisfying as a smooth, neat lawn. By levelling your soil before installing turf, you can avoid a lawn that looks like a miniature mountain range, allowing every roll to sit perfectly and giving your outdoor space a polished, professional finish.
Save Time and Money
It might seem like extra effort upfront, but proper groundwork now will save you time, money, and frustration later. Uneven lawns often require patching, re-turfing, or drainage fixes—effectively undoing your initial efforts. A little extra care at the start goes a long way toward a lawn that lasts.
Tools & Materials You’ll Need To Level Your Ground For Turf
Materials
- Topsoil
- Lawn sand
- Compost
- Turf rolls
Equipment
- Wheelbarrow
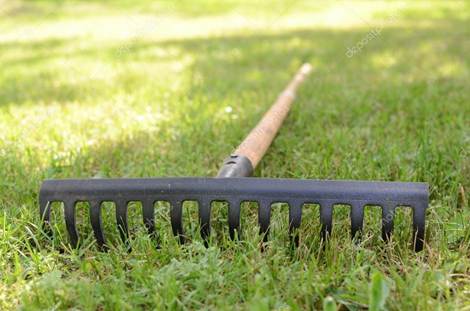
- Rake
- Shovel
- String Line/ Stakes (slope checking)
- Turf cutter (if removing grass)
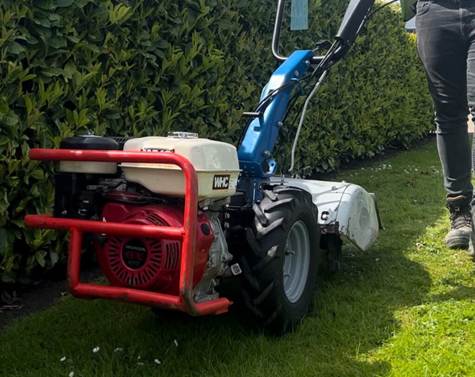
- Rotovator (If soil is over-compacted)
- Lawn Roller/ Compactor
- Hose/ Sprinkler
Step-by-Step Guide to Levelling Your Ground for Turf
Levelling your ground for turf doesn’t have to be rocket science. With a few simple techniques, you can easily transform your lawn into a smooth, professional-looking canvas. Here’s a step-by-step guide to help you get it right:
1. Clear the Area
Start by clearing the area of any existing turf, weeds, stones, or debris. Your new turf will need a clean, even surface to establish strong roots. For large areas, a turf cutter will save you time and effort. Smaller spaces can be tackled with a spade or by hand.
2. Break Up the Soil
Next, loosen the existing soil to improve airflow, drainage, and root penetration. Aim to break up the top 4–6 inches of soil. A garden fork works well for small patches, while a rotavator gives consistent results on larger areas.
3. Add Soil, Sand, and Fertiliser
Once the soil is loosened, it will be much easier to spread and level. Use a garden rake to smooth out the surface, then add a mixture of topsoil, sand, and fertiliser where needed. This helps correct uneven areas and create any gentle slopes you want for drainage.
4. Mix Into Existing Soil
Don’t just leave new materials sitting on top. Mix the added soil, sand, and fertiliser thoroughly into the existing soil to improve the overall structure and nutrients. This can be done with a garden fork, but for best results, a rotavator ensures an even blend.
5. Rake and Check Levels
Rake the surface again to smooth it out and carefully check for dips or high spots. A straight edge or long piece of timber is handy for spotting uneven areas. Adjust as necessary until you’re happy with the finish.
6. Lightly Compact
Using the back of your garden rake, a plank of wood, or even a light garden roller, gently tamp the soil. This prevents the ground from sinking after turf is laid and highlights any last uneven areas that need adjusting. Remember—not too firm, just enough to settle the surface.
7. Final Rake for Binding
Before laying turf, give the soil a final light rake. This encourages the turf to bind properly with the soil below, helping roots establish quickly and securely.
Pro Tips for Levelling Your Lawn for Turf
When levelling your lawn for turf, we’re all aiming for the best results. Here are some essential tips to consider before you get started:
1. Weather Matters
The weather and soil conditions play a huge role in how well your new lawn establishes. The best seasons to lay turf are spring and autumn, when the ground is naturally warm and moist. Ideally, the soil should be soft and well-hydrated—but not waterlogged. Laying turf in extreme heat or frost will make it harder for roots to take.
2. Use Quality Topsoil
Choose good-quality topsoil, sand, and fertiliser to fill dips or enrich your soil before turfing. This doesn’t mean you need the most expensive option—just buy the best your budget allows. Better-quality products ensure the best results, helping your lawn stay healthy and green for longer.
3. Don’t Over-Compact the Ground
After loosening your soil, avoid compacting it too much before laying turf. Excessive walking on the prepared area can undo your hard work and create new bumps. To spread your weight evenly while laying turf, use a scaffold board or planks to walk across the surface. This keeps the soil firm but not overly compressed.
4. Install Gradients Away From Your House
Even though your lawn will absorb some water, it’s best practice to create a slight gradient away from your home. This prevents water from pooling near your foundations, which over time can cause damp issues or structural problems. You can use your string line to help establish this fall.
Easy Mistakes to Avoid
If you’ve got limited experience in levelling soil for turf, it’s natural to make a few mistakes along the way. In truth, that’s how most of us learn—but here are some common pitfalls you can easily avoid:
1. Rushing the Job
Don’t rush the process. It’s easy to get carried away and try to finish as quickly as possible, but taking your time will reduce errors and lead to a much better finish.
2. Laying Turf on a Dry Day
Avoid laying turf when the ground is bone dry. This is why spring and autumn are the best times for turfing—the soil is naturally moist, the temperatures are moderate, and conditions are perfect for healthy growth.
3. Forgetting to Water
New turf needs consistent watering to establish strong roots. Plan to water it twice a day for the first couple of weeks. Investing in a hosepipe and sprinkler system will save you time, effort, and ensure even coverage.
4. Underestimating the Work
Levelling and turfing a lawn is more labour-intensive than many people expect. It’s easy to underestimate the amount of preparation required to achieve professional results. Using the right landscaping tools will make the job faster, easier, and far less stressful.
Conclusion
Creating a pristine, luscious, green, and level lawn takes time and effort—but it’s essential if you want it to thrive year after year. By putting in the groundwork first, you give your turf the right foundations it needs to grow strong, drain properly, and look its absolute best.
Remember, rushing the process will only cause problems later on. Instead, follow the steps outlined in this guide, use the right tools to support your efforts, and keep up with the aftercare. Do this, and you’ll be rewarded with an inviting lawn that radiates health.
If you don’t have access to all the equipment you need, the wide range of landscaping tool hire from WHC Hire Services can make the job easier and far less stressful. From rotavators to turf cutters, you can hire professional-grade tools without the big investment—helping you prepare your ground like a pro.
Explore our range of affordable landscaping tool hire, or speak to one of our friendly team to get started.