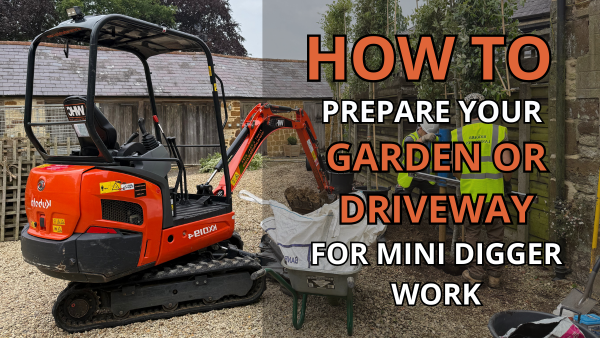
How To Prepare Your Garden Or Driveway For Mini Digger Work?
Preparing your garden or driveway for mini digger work is essential when tackling a home DIY project. Whether you’re landscaping, installing a new driveway, or setting out some fresh footings, mini diggers can save you a huge amount of time—and a lot of backbreaking work. Music to your ears when you’ve only got the weekend to get it done!
But before your machine arrives, it’s time to prep. In this WHC Hire guide, we’ll walk you through the must-do steps before you dig into your project. This includes getting your home ready for delivery, identifying underground services, checking if you need planning permission, and more.
Let’s waste no more time and get started.
Checking Access Points
Before you even think about ordering a mini digger, you need to assess the area you’ll be working in and identify any potential hazards or obstacles you might need to navigate. In some cases, this could even mean getting a mini digger through your house. Yes—there are machines compact enough to do that!
Measuring your access points is crucial to ensure that when your machinery arrives, you’re not left trying to squeeze it through a tight space. Common obstacles to watch out for include:
- Side alley access
- Garden gates
- Interior doorframes
- Driveway obstructions
- Overhead cables
Spotting these early will help you choose the right mini digger for the job—avoiding one of the five most common mistakes people make when hiring a digger for the first time.
Once you’ve identified your access and entry points, you’ll have a clear idea of which size excavator you need for your task. If you’re ever unsure, speak to a reputable plant hire specialist like WHC Hire Services—we’re here to help.
Plan Your Work
When hiring a mini digger for your home renovation project, it’s vital to make every second count. That means having a clear plan of what you want to achieve so your investment goes the distance.
Your planning should include the specific tasks you want to carry out with the digger—for example:
- Digging trenches
- Setting out a shed base
- Preparing foundations for a new driveway
It’s also crucial to mark out your working zones—this includes your digging area, where you’ll place the spoil (excavated material), and space for the digger to manoeuvre. Doing this early helps you visualise how the project will come together. Use line paint or marker spray to lay out your excavation zones clearly. These visual reference points will keep your work tidy and on track.
Don’t forget to organise how you’ll manage the spoil. In most DIY cases, it’s removed off-site using a skip or redistributed elsewhere on your property. You’ll need a clear plan for how to move spoil from the excavation point to its final destination. This can be done by hand with a wheelbarrow—but if you want to work smarter, consider hiring a track barrow to transport and offload material more efficiently.
Planning Permission
Now that you have a clear plan of action, it’s important to check whether the alterations you want to make to your home require planning permission.
While many small garden or driveway projects fall under Permitted Development Rights, there are situations where you may need to seek approval from your local planning authority.
You’ll likely need planning permission if your project involves:
- Altering drainage or ground levels near a boundary
- Working on a listed property or within a conservation area
- Excavating close to your neighbour’s foundations
- Installing a new driveway using impermeable materials
If you’re ever unsure, it’s always best to consult your local council’s planning portal or speak with a qualified professional before starting work. Taking this step now can help avoid costly delays or disruptions later in the project.
Additionally, if your project does require planning permission, you’ll gain a better understanding of the timeframe involved. This will help you avoid the frustration of hiring a mini digger that ends up sitting unused while you wait for approval.
Identifying Underground Services
Before you even think about putting bucket to ground, you need to be aware of any underground services you might come across while excavating.
Striking underground utilities can lead to costly repairs—and even life-threatening consequences if you hit something like high-voltage power cables. So, how do you identify underground services quickly and safely?
Here are three common ways DIYers can identify underground services:
- Visually identifying indicators
- Consulting property surveys
- Using a CAT (Cable Avoidance Tool)
1. Visually Identify
The first and easiest method is to check the area by eye. Look out for visible indicators like:
- Drain covers
- Water inlets
- Manhole covers
These often point to underground services that may lie directly beneath or nearby. Clearly mark them out before digging.
2. Check Property Surveys
If your property was surveyed when you first purchased it, there’s a good chance you have a record of where services are located. If no additional underground services have been installed since, this map can still be a reliable guide for your project.
3. Use a CAT Scanner
Cable Avoidance Tools (CATs) are essential for safe excavation, especially if you don’t have access to a current property survey. While you may visually spot drains and other obvious signs, a CAT scanner can help detect hidden underground services like electric, water, or telecom lines. It will also give you a more accurate idea of their exact position, allowing you to mark out safe zones for digging.
Clear The Area
The next step in preparing your garden or driveway for mini digger work is to clear the working area. This includes removing anything that could be damaged or get in the way—such as garden furniture, plant pots, benches, or decorative features.
It’s also essential to cut back any trees or low-hanging branches that could interfere with the digger’s operation or swinging arm. The last thing you want is to accidentally damage your hire equipment or your property.
In addition, we highly recommend clearing a route for spoil (excavated material) to be easily transported off-site or to another part of the garden. Avoid creating unnecessary obstacles in the path—sometimes this means removing a fence panel or two to streamline the process.
Taking time to do this now will make the job faster, safer, and far less stressful once work begins.
Protect Surrounding Surfaces
Before introducing a mini digger to your project, it’s important to protect any surrounding surfaces that could be affected during the work. This might include grassed areas, paving, tarmac, or drain covers.
To help minimise damage, consider using track mats or protective boards. These create a stable surface for the digger to travel across, reducing wear and tear—especially on softer or decorative areas.
If your project ends up taking place in wet weather, take extra precautions. Damp ground is far more vulnerable to tearing and rutting under the weight of a digger. Laying down additional ground protection will help preserve your existing surfaces and avoid unnecessary repair work afterwards.
If you’re unsure what kind of protection is best for your space, speak to your local mini digger hire specialist for advice tailored to your site.
Safety Requirements For Mini Digger
Now that your site is nearly prepped, it’s time to focus on the safety requirements for using a mini digger.
While you don’t need a formal licence to hire or operate a mini digger, it’s essential to exercise caution—especially during home renovation work. This includes:
- Wearing the correct Personal Protective Equipment (PPE)
- Reading and understanding the operator’s manual before starting work
Before using the machine live, take time to familiarise yourself with the digger’s controls. While most mini diggers share similar control patterns, their responsiveness and sensitivity can vary between manufacturers.
If you’re hiring a mini digger in Gloucestershire, WHC Hire Services provides free walk-through demonstrations on all of our machinery. These ensure you understand the basic controls and help you stay safe while completing your project.
Here is an example of what you can expect:
Setting A Timeline
Not sure how long your project will take? Setting a realistic timeline is essential to ensure you have your mini digger for long enough to get the job done properly.
For most homeowners, weekends are the busiest time for DIY and renovation work. It’s important to plan your hire period around your availability—and always allow extra time for unexpected delays, such as bad weather or late deliveries.
By working with a reputable plant hire company, you’ll benefit from added flexibility if you need to extend your hire due to unforeseen circumstances. At WHC Hire Services, we offer flexible hire options ranging from a single day to full weekly hires, giving you the freedom to tackle your project at your own pace.
Talk To The Experts
If you’re still unsure which mini digger is right for your project, don’t worry—the friendly team at WHC Hire Services is here to help.
Our award-winning service will help you access the right equipment tailored to your home renovation needs. Whether you’re installing a new driveway, digging a shed base, setting out new footings, or bringing that dream patio to life, we’re here to help you get the job done quickly, safely, and efficiently.
All our mini diggers come with access to our industry-leading digital self-help service, designed to support first-time users by helping troubleshoot common operator queries.
Take a look at our wide range of mini diggers available from our Gloucestershire depot, or contact your local WHC Hire branch to arrange your hire today.